The GWCT Mink Raft is now available commercially (see list of suppliers), so you may want to skip this section. However, it was intended for home construction and is easy to build. You will need three power tools: a hand-held circular saw, jigsaw and drill (you could use manual tools if you are making only a few rafts and don’t mind work). You will also need trestles (or similar supports), two G clamps or speed cramps, hammer, screwdriver, spanner and knife. A staple gun is handy but not essential. One person can make four to five rafts per day.

Figure 1: An exploded diagram of a mink raft. (click for a larger version)
The GWCT Mink Raft has three elements (see Figure 1): a buoyant raft base, a removable tracking cartridge and a wooden tunnel.
Recommended tools
- Circular saw with plywood cutting blade
- Jigsaw with fine-toothed or plywood blade
- Cordless drill
- Extension lead
- Appropriate safety wear
- Long straight edge
- Tape measure and ruler
- Two cramps (or G clamps)
- Tin-snips or wire-cutters
- 8mm wood drill bit
- Hand stapler and 12mm staples
- Sandpaper
- Sharp long-bladed knife
- Portable work bench and trestle support
- Pencil and felt-pen
Material list
The dimensions of a mink raft allow for economical cutting of standard, off-the-shelf sheet materials that are available from good builders merchants.
This lists the standard products you’ll need, and in brackets, the quantity required to build one mink raft.
Wood
- Sheet of 6x2440x1220mm exterior plywood (2 pieces @ 1220x610mm)
- Amount of 10x2440x1220mm exterior plywood (1 piece @ 660x250mm)
- Amount of 25x175mm tanalised gravel board (2 @ 660mm long)
NB. The cheapest plywood sheets are often of poor quality so use sheets that contain hardwood all the way through, rather than sheets that just have hardwood on the exterior faces. The better quality sheet may cost more, but your raft will last considerably longer! Note that one 6mm ply sheet will make two rafts, so double up on all other materials if you want to make two rafts and make best use of this sheet. 10mm plywood (of which you only need a small amount per raft) is often available in quarter sheets from major DIY stores.
Fixings
- 80mm long M6 eye bolts, washers and wing nuts (2 bolts, 4 washers and 2 wing nuts)
- 80mm long M6 roofing bolts, washers and wing nuts (4 bolts, 4 washers and 4 wing nuts)
- Quantity of 4x25mm woodscrews (x14)
- 50mm metal corner brackets (4 brackets or 4 pieces of fixing band @ 100mm long) or, if building many rafts, a roll of 20x1mm galvanised steel fixing band
Other
- Sheet of 50x2400x1200mm polystyrene insulation (1 piece @ 1200x600mm)
- 25x25mm (approx) plastic garden or wire aviary mesh (2 pieces @ 500x250mm)
Step-by-step instructions
Step 1
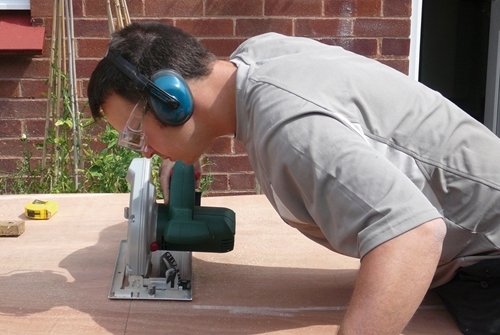
 Rest your sheet of 6mm plywood across a stable workstation. Unless your workstation is large, you will need to support the sheet at either end. Using a straight edge, measure and mark cut-lines on the sheet, splitting it into four equal quarters. Each quarter should measure 1220x610mm. Using your cramps, fasten the sheet of plywood to your workstation. Before you saw through them, check that your cut-lines are sufficiently proud of the workstation and away from any electric cables. Cut the sheet into four quarters. (If you plan only to make one raft, you will only need to cut two quarters.)
Step 2
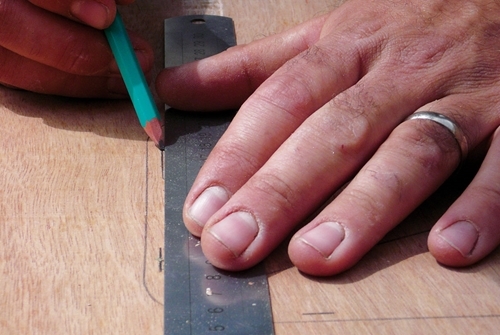
 Take one of your quarter pieces. Align a straight edge across opposite corners and draw a cross in the middle of the sheet to locate the centre point. Place your Handy basket, upside down, over the top of your cross. Align the centre of the cross on the bottom surface of the basket, with the centre of the cross on the plywood. Use a tape measure to check the sides of the basket are equidistant, and square with the sides of the plywood. Draw a line around the up-turned basket to form a rectangle with rounded corners.
Step 3
 On the inside of the basket outline, use a ruler to mark lines 5mm from the outline. Use a ruler to connect these lines. You will need to draw the rounded corners carefully by hand, or by using the handy basket’s rounded corners as a template. The outline of your ‘new’ rectangle with rounded corners, should be perfectly parallel with the original basket outline. The new line is your cut-line. (When you cut this piece of plywood out, and drop the basket through the window you have created, the basket will suspend itself by hanging from its upper perimeter lip.)
Step 4
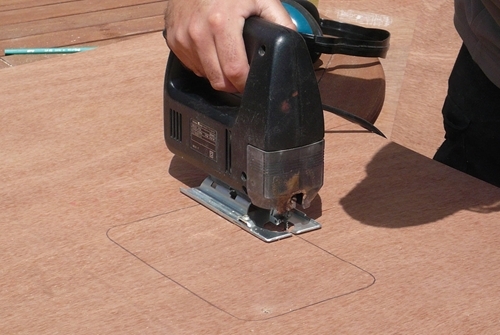
 With your cut-line uppermost, lay the sheet on top of another quarter plywood sheet. Align the two sheets and grip them together using cramps at both ends. Drill a pilot hole through both sheets, just inside the window cut-line. (Make sure you don’t drill through anything you don’t want to!) The hole should be wide enough to accept the blade of your jigsaw. Plywood splinters easily, so it is best to use a fine-toothed jigsaw blade or one specially designed for cutting curves in plywood. Carefully following your cut-line, use your jigsaw to cut a window in both sheets of plywood. (Make sure the blade of the saw is clear of any support or wire cables before you start.)
Step 5
 Using a tape measure, felt pen and straight edge, mark out the polystyrene sheet into four equal quarters, as you did with the plywood sheet in Step 1. Each quarter should measure 1200x600mm. Using a sharp knife, cut a quarter off. Align this quarter piece of polystyrene sheet, centrally, between the two plywood sheets that you’ve cut windows in, to form a polystyrene ‘sandwich’. Hold the sandwich together using cramps at both ends. Using an 8mm wood drill bit, drill a hole 5cm from the long side and 10cm from the short side, through each corner of the sandwich. Next, drill a hole either side of the window, 5cm from the sandwich edge, so the two central holes align with the four corner holes (see step 6).
Step 6
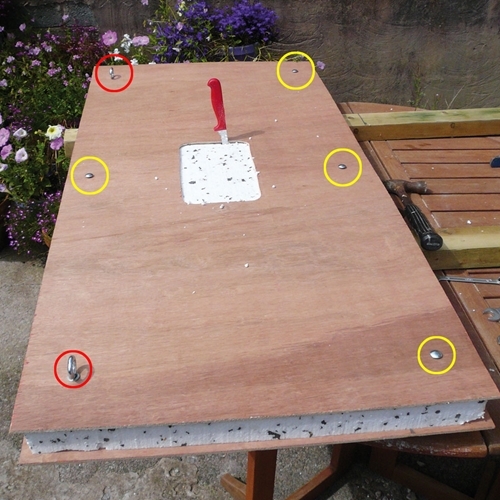
With the sandwich still held together with cramps, push an 80mm long eye bolt (with washer) through the two corner holes on one long side of the sandwich (ringed in red in below image). Push 80mm long roofing bolts through the remaining four holes (ringed in yellow in below image). Turn the sandwich through 90 degrees so that it rests on its side. Thread washers on each bolt, and use wing nuts to fix the sandwich together. We suggest that you apply superglue to the bolt threads to keep the nuts from coming loose. Put the cramps to one side.
Step 7
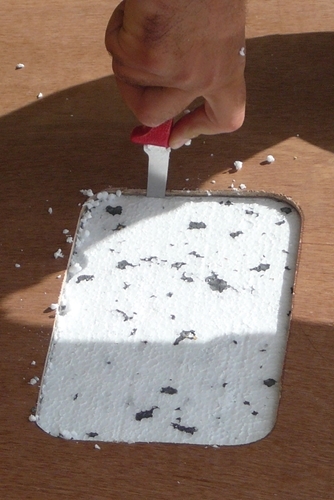
 Use a sharp knife to cut out the polystyrene rectangle visible through the plywood windows. To make a clean cut, push the knife blade right through the polystyrene sheet and cut along the window edge carefully. (Make sure the knife blade is clear of the workstation before you start cutting.) Knock the cut piece out and check that your Handy basket fits the window. The basket should fit in snugly (but not tightly) and suspend itself from its perimeter lip. Finally, use sandpaper to remove the rough edges and splinters around all the sawn edges. You are now ready to make the raft tunnel.
Step 8
The tunnel’s dimensions need to take account of the type of trap you intend to use. This guide assumes the raft operator will be using a Rhemo Products live catch cage trap. (The dimensions of a Rhemo trap are 600x180x160mm.) Cut two 660mm lengths of 25x75mm gravel board. These two pieces will form the tunnel sides.
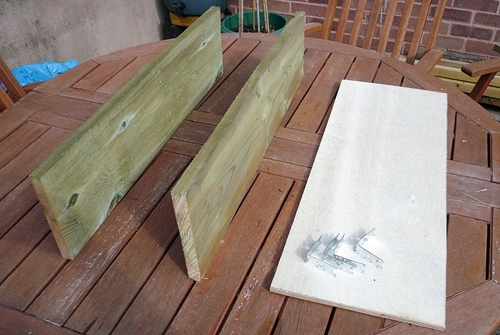
Next cut a sheet of 10mm plywood to give you a piece 660x250mm. This will form the tunnel roof. To attach the tunnel to the raft use off-the-shelf right-angle brackets, or if you’re making a large batch of rafts consider making your own. If the latter, using a pair of tin-snips, cut four 100mm lengths of fixing strap. Bend each strap across the middle so that the two ends align. Open the straps back out to form right angles.
Step 9
 Take the plywood roof and draw a pencil line 12mm from, and parallel to, one long edge. On this line, mark two corner screw points 40mm from the short edge. Mark a central hole between these two points. Repeat this procedure along the other side. Align the roof piece with the two tunnel sides, and using your six screw points attach the roof using 25mm long screws.
Step 10 (optional)
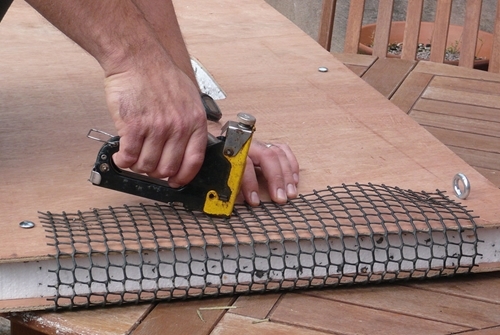
Recent trials, using rafts without mesh, suggest that fixing mesh to the raft ends to help visiting mink and other wildlife board the raft, may not be necessary, but it was part of the original design. Using tin-snips, cut two pieces of 500x250mm mesh. Wrap a piece, centrally, around either end of the raft and secure the mesh with a staple gun. Use staples with a depth of at least 12mm. If you don’t have a staple gun, use a hammer and small galvanised staples instead.
Step 11
 To finish your mink raft, place the tunnel directly over the raft window. Check the internal sides of the tunnel are equidistant and parallel with the sides of the window, and the tunnel entrances are equidistant from the raft-ends. Set four right-angle brackets 100mm from the tunnel entrances, and fix the tunnel to the raft using 25mm screws.
Get your FREE Mink Raft Plans today
 The award-winning GWCT Mink Raft was developed both as a means of detecting mink, and as a favourable trap site.
What you can download for free
✓ Mink Raft Guidelines
✓ Instructions & Plans
✓ How to Build the GWCT Mink Raft
Download now >